The step-by-step tutorial:
The Clustaar platform gives endless possibilities to the users. We are going to build a simple contact form with an email address, a fallback and the client message. We will also give customers the opportunity to modify their message before sending it (because here at Clustaar we do things properly 👌), and we will create a confirmation message for your client.
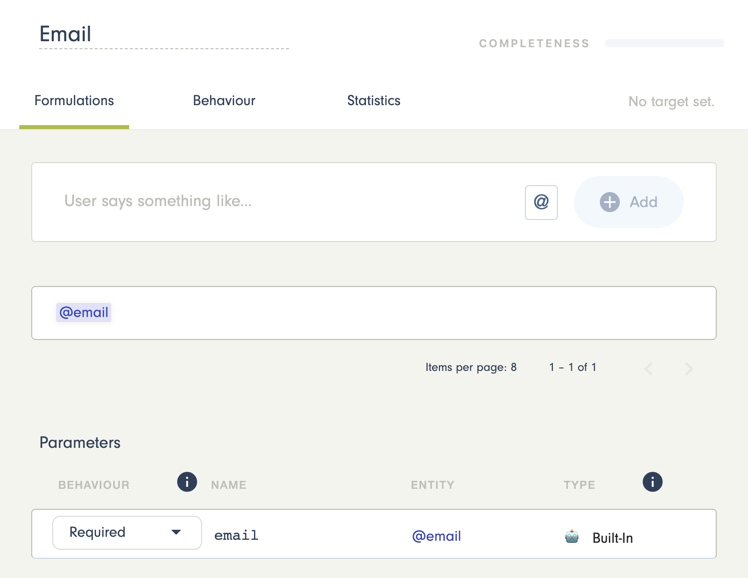
To create a contact form, you will need to use Sessions and the email Entity that is built-in the Clustaar platform. Please have a look at the two articles on the subject: here and here. And be sure to read thoroughly, as we added a little bonus just for you at the end 😉
1. Email Address Intent
Create an email Intent if you haven’t done it yet. Use the built-in email Entity. We wrote a useful tutorial on Intents right here.
2. Story: Email and Message
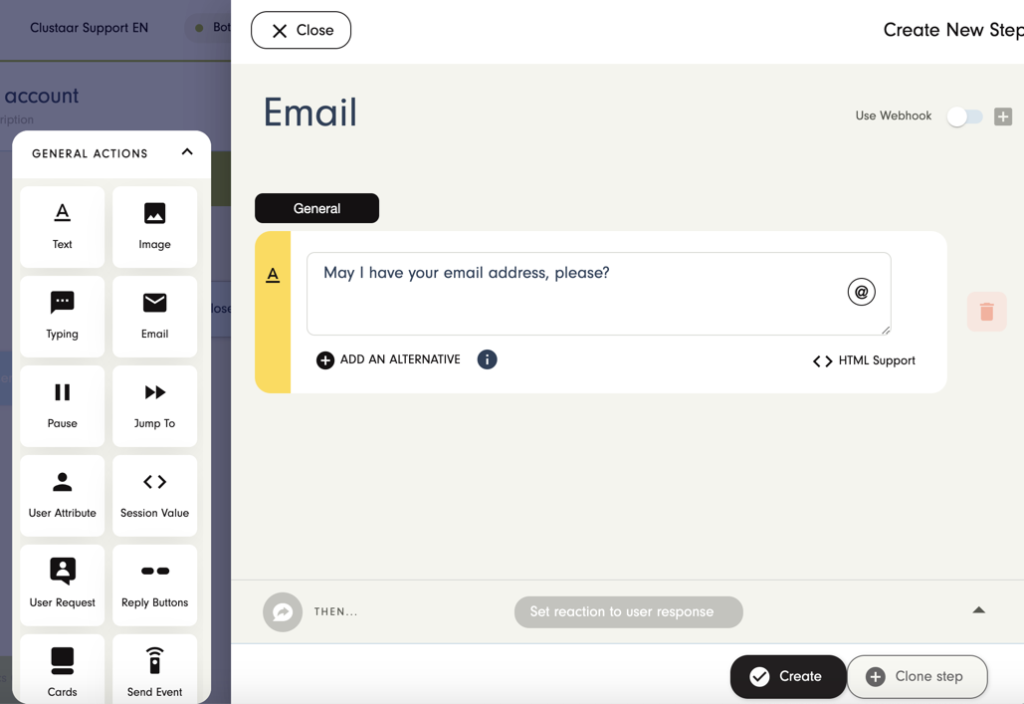
A. Email
Create your Story and the first step.
Click on the new Step you just created and write your question.
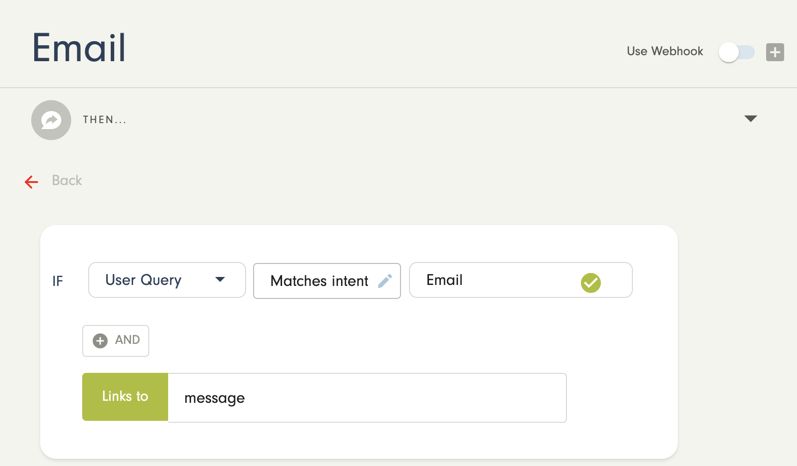
Now, click on “then” and add a connection. Set it on the email Intent you created at the beginning and link it to your next Step.
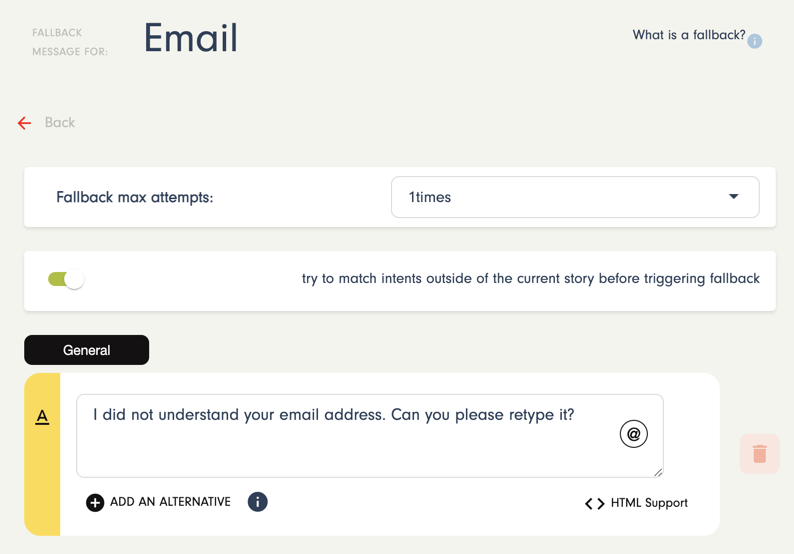
Email Fallback:
You can’t send a contact form if the text fields are not correctly filled out. We want it to be the same on ours, so we are going to create a Fallback on the email Step.
Type the Fallback message you want the user to see and choose how many times you want it to appear.
💡 Tip: Remember to always set a Fallback message when you use the email Entity.
Learn more about Fallbacks.
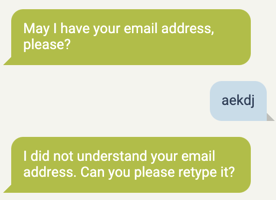
Don’t forget to test your Story as you go:
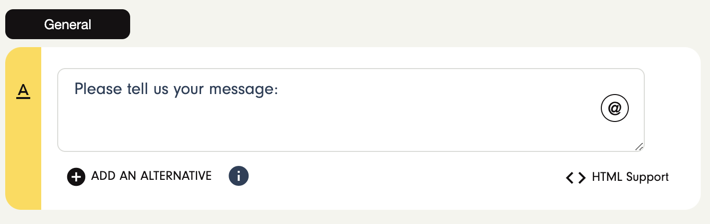
B. Message
Create a “Message“ Step.
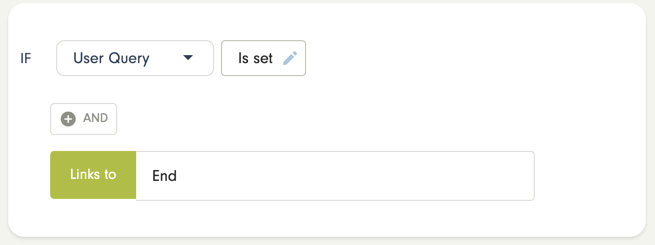
Link it to your next Step use an “Is set” connection. . We called it “End”.
3. Modify or Send
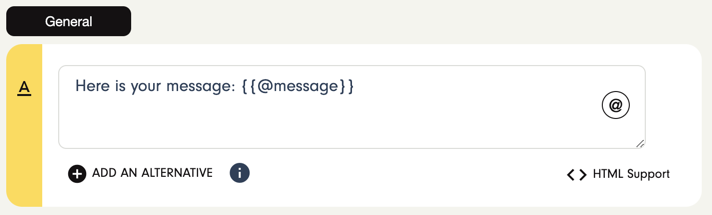
Click on the “End” Step you just created.
First, we want the user to see their message to reread it, the {{@message}} function enables the chatbot to display the user’s previous message.
Then, we ask the user if they want to send or modify their message. We use Quick Replies for this feature.
More information on Quick Replies here.
Send: Link the “End” button to your final Step (we called it “Thanks”). You can create it directly.
Modify: Link the “Modify” button to the previous Step, in this case “Message”.
Don’t forget to set a Session on the user’s message or else the bot won’t remember it 😉
Key: messagesent
Value: {{@message}}
Hang in there — we are almost done! 😊
Now, click on the “Thanks” step we just created with our “Quick Replies”:
4. “Thanks” step and Message Confirmation
The Clustaar chatbot can send emails with the “Email” action card. Send all the information that you created with Sessions in the email body.
Here is a good formula: {{@session. (+the “key” you chose previously) }}
Learn more
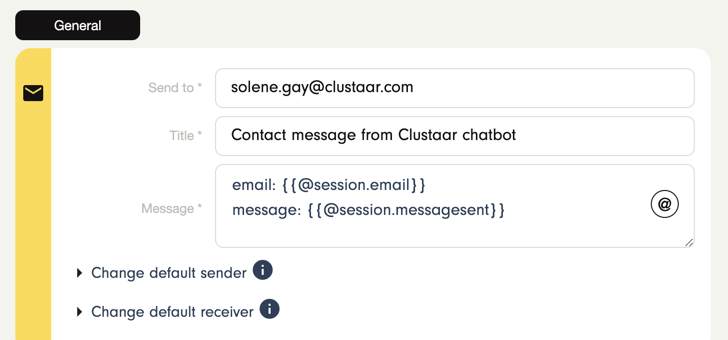
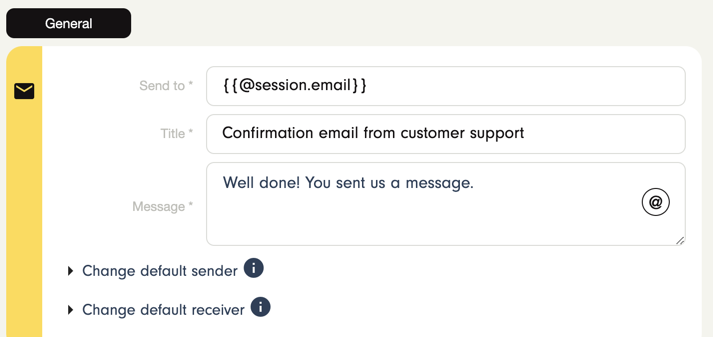
Message Confirmation : You want your client to receive a confirmation email ? You can do it with the user’s email you stored in the Session.
We use our Session feature in the “Send to” field.
Well done! You just created a contact form! 👏